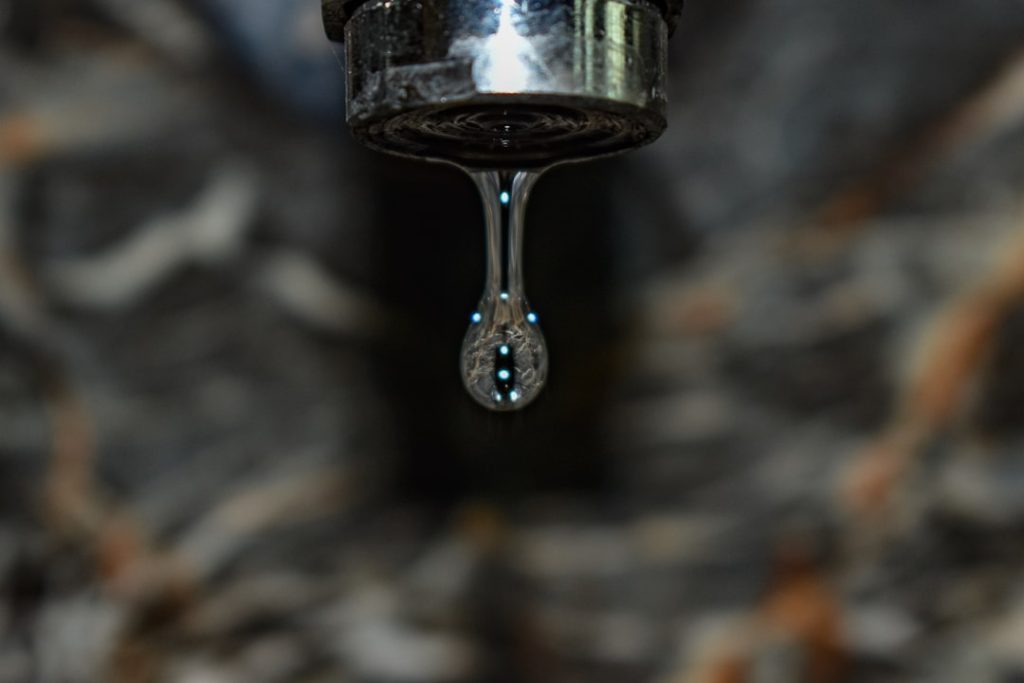
Why That Annoying Drip Is More Than Just a Nuisance
A leaky faucet fix is one of the most common, and most underestimated, plumbing repairs homeowners face. That constant drip, drip, drip echoing through your home isn’t just a minor annoyance that tests your sanity—it’s a clear sign of wasted resources and money literally going down the drain. Ignoring it can lead to bigger problems, from higher utility bills to potential water damage and mold growth over time.
Quick Fix Summary:
- Turn off water supply: Locate the small shutoff valves under the sink and turn them clockwise until they are fully closed.
- Identify faucet type: Determine if you have a compression, ball, cartridge, or ceramic disk faucet, as the repair process varies for each.
- Disassemble and Replace Worn Parts: Carefully take the faucet apart, paying attention to the order of components. Replace the worn-out culprits, which are usually inexpensive O-rings, washers, or a single cartridge unit.
- Reassemble Carefully: Put the faucet back together in reverse order, ensuring all connections are snug but not overtightened, which can damage the new parts.
- Test for Leaks: Slowly turn the water supply back on and thoroughly check the faucet and under-sink connections for any signs of dripping.
Just how much water is wasted? According to the EPA, a single leaky faucet that drips at the rate of one drip per second can waste more than 3,000 gallons per year. That’s enough water to take more than 180 showers! This isn’t just an environmental concern; it’s a significant and unnecessary expense on your water bill that compounds month after month. A simple, quick repair can often pay for itself in water savings in just a few months.
The good news is that you don’t have to be a master plumber to solve this problem. Most faucet leaks are caused by simple, inexpensive parts that have worn out over time. With a few basic tools and a little patience, you can tackle this repair yourself, saving both water and the cost of a service call.
Common causes include:
- Worn O-rings or washers: These small rubber components create seals but can become hard, cracked, or worn down from constant friction and age.
- Corroded valve seats: The connection point between the faucet and the spout can build up mineral deposits, especially in areas with hard water, preventing a watertight seal.
- Damaged cartridges: In modern faucets, this single unit controls water flow. Internal seals can wear out, causing a persistent drip even when the handle is off.
- Mineral buildup from hard water: Calcium and magnesium deposits can clog internal components, restricting movement and preventing parts from sealing properly.
As Jesse Delgado, a licensed plumber and owner of Flow Pro Plumbing with over ten years of experience, I’ve helped countless East Bay homeowners master the leaky faucet fix and other essential plumbing repairs. My hands-on approach focuses on empowering homeowners with the knowledge and confidence to handle basic repairs while knowing when to call in professional help for more complex issues. We believe an informed customer is our best customer.

Diagnosis and Preparation: Your First Steps to a Drip-Free Sink
Before diving into your leaky faucet fix, a little detective work and preparation can make all the difference. Let’s figure out what’s causing that annoying drip and gather everything you’ll need. Understanding the root cause will save you time, frustration, and potentially multiple trips to the hardware store. A well-prepared DIYer is a successful one.
Most faucet leaks aren’t mysterious plumbing disasters; they’re usually caused by simple wear and tear on internal components. Think of your faucet like a car: after thousands of cycles of turning on and off, certain parts just need replacing. Identifying the likely point of failure is the first step.
The most common culprits behind your dripping faucet include:
-
Worn O-rings: These are small, circular rubber rings that create watertight seals around moving parts, like the base of the spout. Over time, the constant friction and exposure to water cause them to crack, harden, or lose their shape. When an O-ring fails, water can easily seep through the gaps, often causing a leak around the handle or base of the faucet.
-
Corroded valve seats: The valve seat is the brass fitting that connects the faucet body to the spout. In areas with hard water, mineral deposits (limescale) can build up on the seat, creating a rough, uneven surface. This corrosion prevents the washer or cartridge from creating a tight seal, allowing water to seep through and drip from the spout. In older faucets, the metal surface can even develop tiny grooves or “canals” from the constant flow of water.
-
Worn-out cartridges: Many modern single- and double-handle faucets use a cartridge system. This self-contained cylindrical component houses all the valves and seals needed to control water flow and temperature. Over years of use, the internal rubber seals within the cartridge can degrade or the plastic housing can crack, causing a persistent leak even when the faucet is turned off.
-
Deteriorated rubber washers and seals: In older compression faucets, a rubber washer is pressed against the valve seat to stop water flow. With each use, this washer endures friction and pressure, causing it to harden, crack, or simply wear thin. This is one of the most frequent causes of drips in two-handle faucets.
-
Loose parts or high water pressure: Sometimes the fix is even simpler. A loose packing nut or screw can cause minor leaks that can be fixed with a simple tightening. Less commonly, excessively high water pressure throughout your home can put constant stress on all your plumbing fixtures, leading to premature failure of faucet components. If you notice multiple fixtures are leaking or your water flow seems unusually forceful, this might be the underlying issue.
Having the right tools and supplies on hand before you start will make your leaky faucet fix much smoother. Here’s a checklist of what you’ll likely need:
- Adjustable wrench and pliers: An adjustable wrench is essential for loosening and tightening the various nuts holding the faucet together. A set of pliers, including standard, needle-nose, and tongue-and-groove (like Channellocks), will help you grip both large components and small, delicate parts.
- Screwdrivers: You’ll need both Phillips head and flat-head screwdrivers for removing handle screws and prying off decorative caps.
- Hex key set (Allen wrenches): Many modern faucet handles are secured with a small, recessed hex screw. A full set will ensure you have the right size.
- Basin wrench: This specialized tool is a lifesaver for reaching the nuts that secure the faucet to the sink in the tight, awkward space behind the basin.
- Penetrating oil (like WD-40): A few sprays can work wonders on stubborn, corroded parts that refuse to budge.
- Plumber’s grease: This non-toxic, heat-proof lubricant is crucial for protecting new O-rings and ensuring moving parts operate smoothly. It helps create a better seal and extends the life of the replacement parts.
- Replacement parts: This is key! Take the old, worn-out parts with you to the hardware store to ensure you get an exact match. Alternatively, find the faucet’s manufacturer and model number (often found on the body or under the spout). Many stores also sell universal repair kits for common brands.
- Rags, a bucket, and a flashlight: Place rags around the work area to protect your sink’s finish and wipe up spills. A small bucket placed under the P-trap can catch any residual water. A flashlight or headlamp is invaluable for seeing clearly in the dark cabinet under the sink.

Identifying Your Faucet Type
Before you can buy parts or start taking anything apart, you must know what type of faucet you’re dealing with. Each of the four main types has a different internal mechanism, and using the wrong repair procedure won’t solve the leak. This step is crucial for a successful leaky faucet fix.
-
Compression faucets: The classic, old-school style with two separate handles for hot and cold. You can feel the resistance increase as you turn the handle to tighten a rubber washer against the valve seat. They are common in older homes and utility sinks and are generally the most straightforward to repair.
-
Ball faucets: These were the first type of washerless faucet and are identifiable by a single handle that moves over a rounded, ball-shaped cap. The handle rotates and pivots to control water volume and temperature. They are often found in kitchens from the 70s and 80s and require a specific repair kit with multiple small parts.
-
Cartridge faucets: These can have either single or double handles but are distinguished by their very smooth lever action. The handle doesn’t require tightening; it moves up and down to control volume and side-to-side for temperature (on single-handle models). The feel is distinctly different from a compression faucet. The faucet body is typically a simple cylinder housing the cartridge mechanism.
-
Ceramic disk faucets: This is the most modern and durable design, usually featuring a single, solid-feeling lever. They are built for longevity, with two highly polished ceramic disks that move against each other to control water flow. These faucets rarely leak but when they do, the repair typically involves replacing the entire cylinder of seals.
If you’re still unsure, look for a brand name or logo on the faucet body (like Moen, Delta, Kohler, or Price Pfister). A quick online search for that brand and a description of your faucet can often help you identify the model and the correct parts.
Shutting Off the Water Supply
This is the most important step of all—never attempt a leaky faucet fix with the water still on. It sounds obvious, but forgetting this step can turn a small repair into a major flood in seconds. Trust me, you don’t want to learn this lesson the hard way!
- Locate the shutoff valves: Look in the cabinet directly under your sink. You should see two small valves, one for the hot water supply line and one for the cold. They usually have small, oval-shaped handles.
- Turn them clockwise: Turn both handles clockwise until they stop. This is the standard “righty-tighty, lefty-loosey” rule. Don’t force them if they are stuck; you could break the valve. If a valve is stiff, try wiggling it back and forth gently to loosen it.
- Use the main shutoff if necessary: If you can’t find the under-sink valves, or if they are frozen and won’t turn, you’ll need to shut off the main water supply to your entire home. This valve is usually located where the main water line enters your house—often in a basement, crawl space, garage, or outside near the water meter.
- Drain the lines: After shutting off the water, open the faucet handles to the “on” position. This will release any trapped pressure and drain the remaining water from the lines, preventing a surprise splash when you start disassembling the faucet.
Now you’re prepared and ready to start your repair with confidence, knowing you won’t be dealing with any unexpected gushes of water during the process.